Create and Log In a User
Guide details
This guide provides a step-by-step guide on creating and logging in a user using the CometChat platform with authentication using the Authentication Token. Additionally, you will need to make sure you have initialized CometChat in your app prior to logging in the user.Introduction
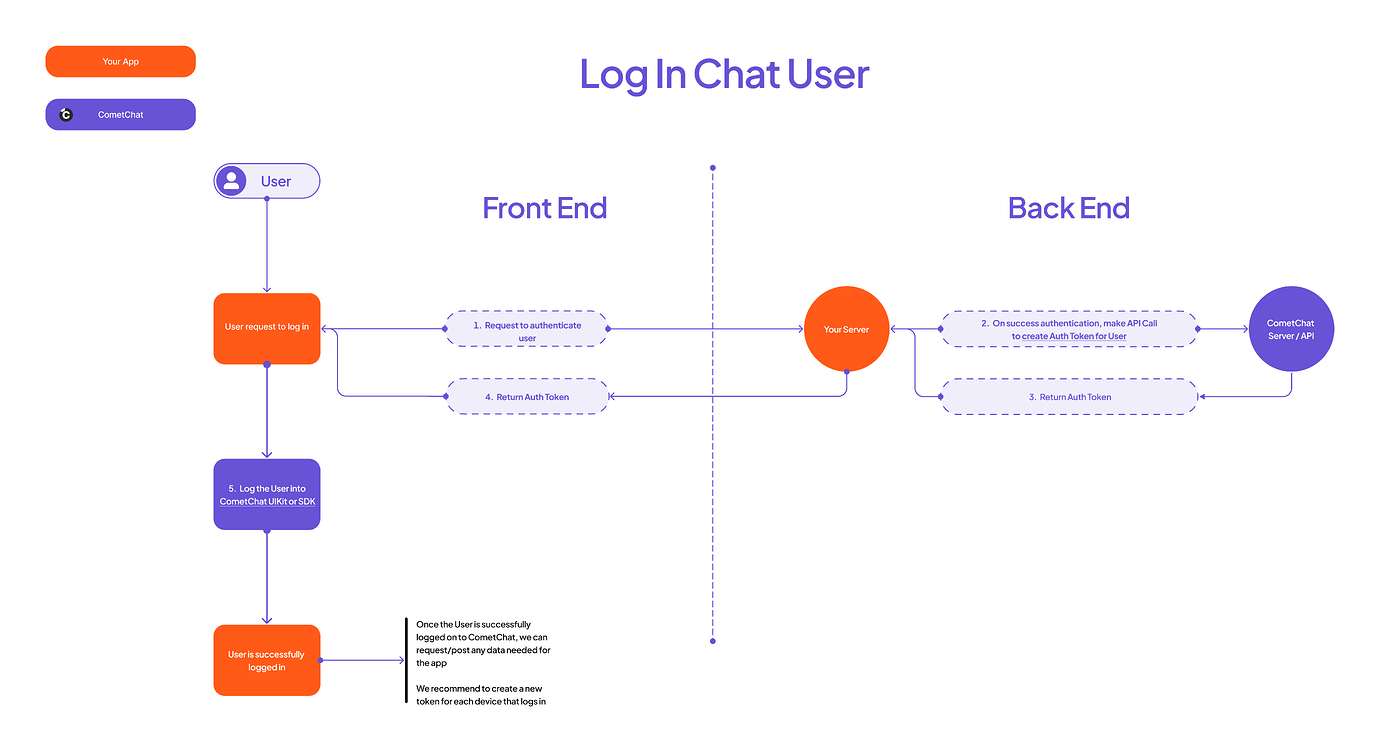
To log in a user, they must first be registered on the CometChat server. For first-time logins, the user needs to be created in CometChat. After this initial creation, we can generate an authentication token for the user. This authentication token, created via the CometChat API, will be used on the front-end to log the user into the CometChat UI Kit, SDK, or Widget. Once the user is successfully logged into CometChat, we can proceed to request or post any necessary data for the app.Prerequisites
- CometChat App (You can create one via the CometChat Dashboard).
- CometChat UI Kit or SDK (Custom Widget as well).
- Your application: Front-end and Back-end / Server Side.
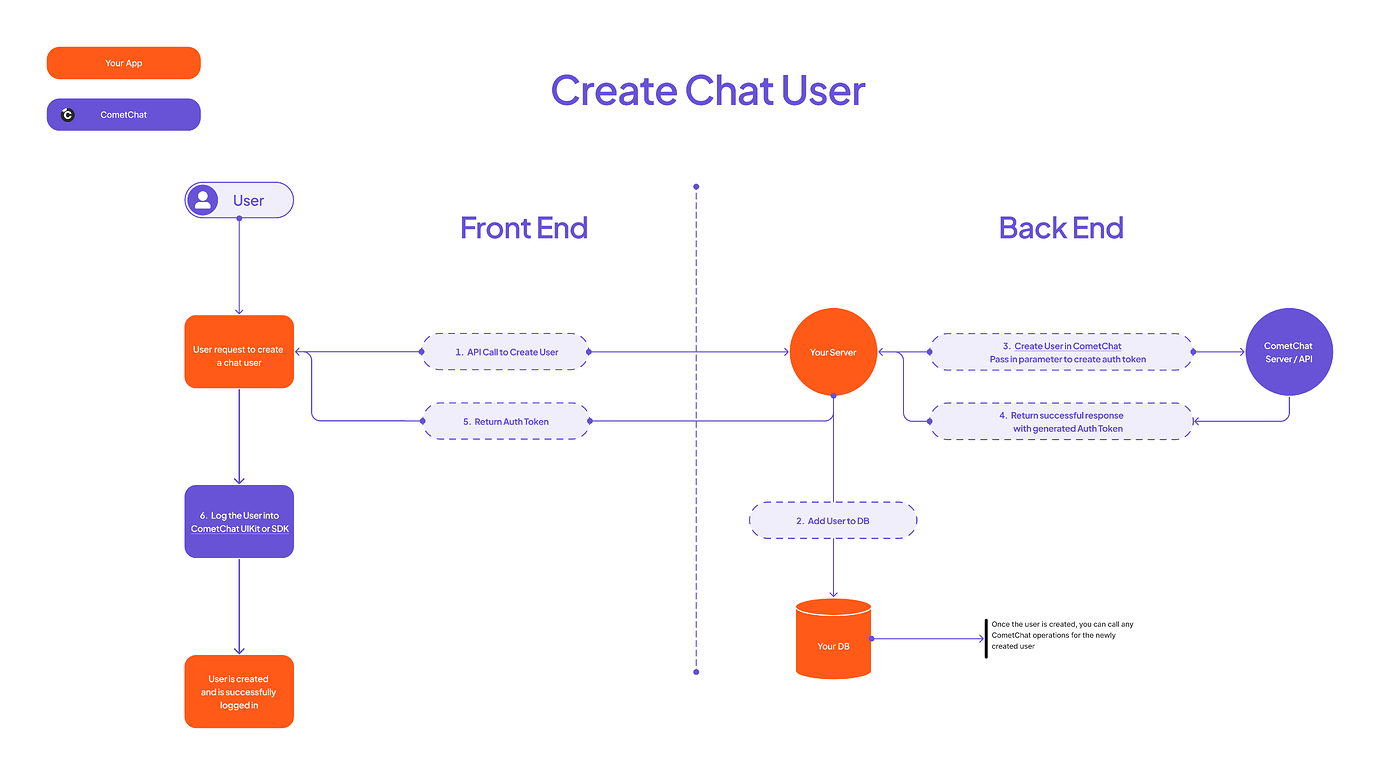
Create Chat User in CometChat
When a new user signs up in your app, create a matching CometChat user from your server using the Create User API. PasswithAuthToken: true to also mint a login token in the same call.
- In your own sign-up flow, create the user in your database.
- From your backend, call
POST /v3/userswith the user’suidandname. - CometChat returns the created user (and an auth token when
withAuthTokenis set). - Return that auth token to your front-end to log the user in.
uid must be unique, ≤ 100 characters, alphanumeric with dashes (no spaces), and cannot be changed after creation. For the full field list and limits, see the Create User reference.
Then log the user into the SDK / UI Kit or Widget with the returned token:
Log In an Existing User
The user already exists in CometChat, so you only need a fresh auth token each time they sign in to your app.- Authenticate the user with your own backend.
- From your server, generate a token via the Create Auth Token API —
POST /v3/users/{uid}/auth_tokens. - Return the token to your front-end.
- Log in with
CometChat.login(authToken)(SDK) orCometChatUIKit.loginWithAuthToken(authToken)(UI Kit). For the Widget Builder, see auth token–based login.
Auth token lifecycle
- Expiry: auth tokens do not expire by default, which keeps users signed in across devices. Generating a new token does not invalidate older ones on their own.
- Retention: CometChat keeps only the 100 most recent auth tokens per user; older tokens are automatically archived and invalidated.
- Revoking sessions: delete one token with Delete Auth Token, or sign a user out everywhere with Flush Auth Tokens (
DELETE /v3/users/{uid}/auth_tokens).