Callback URL that you configure. Upon receiving the message, you can process it according to your business logic and send a response using CometChat’s API.
A custom bot lets you bring your own backend and logic — CometChat only forwards messages to your callback URL and posts your responses back. If you would rather configure an agent (tools, knowledge base, MCP servers) without running your own orchestration, use CometChat’s native Agent Builder APIs instead.
Create a callback endpoint
Callback endpoint requirements
- Your callback endpoint must be accessible over HTTPS. This is essential to ensure the security and integrity of data transmission.
- This URL should be publicly accessible from the internet.
- Ensure that your endpoint supports the HTTP POST method. Event payloads will be delivered via HTTP POST requests in JSON format.
- Configure your endpoint to respond immediately to the CometChat server with a 200 OK response.
Security
It is recommended to set up a Basic Authentication that is usually used for server-to-server calls. This requires you to configure a username and password. Whenever your callback endpoint is triggered, the HTTP Header will contain:Configuring a bot
Create a user
CometChat requires each bot to be linked to a user account. This approach offers a significant benefit: It allows you to log in as the bot at any time and send personalized responses. Therefore, before setting up a bot, you must first create a new user. You can create a user from CometChat dashboard or make use of CometChat’s Create user REST API to do so.Create a bot
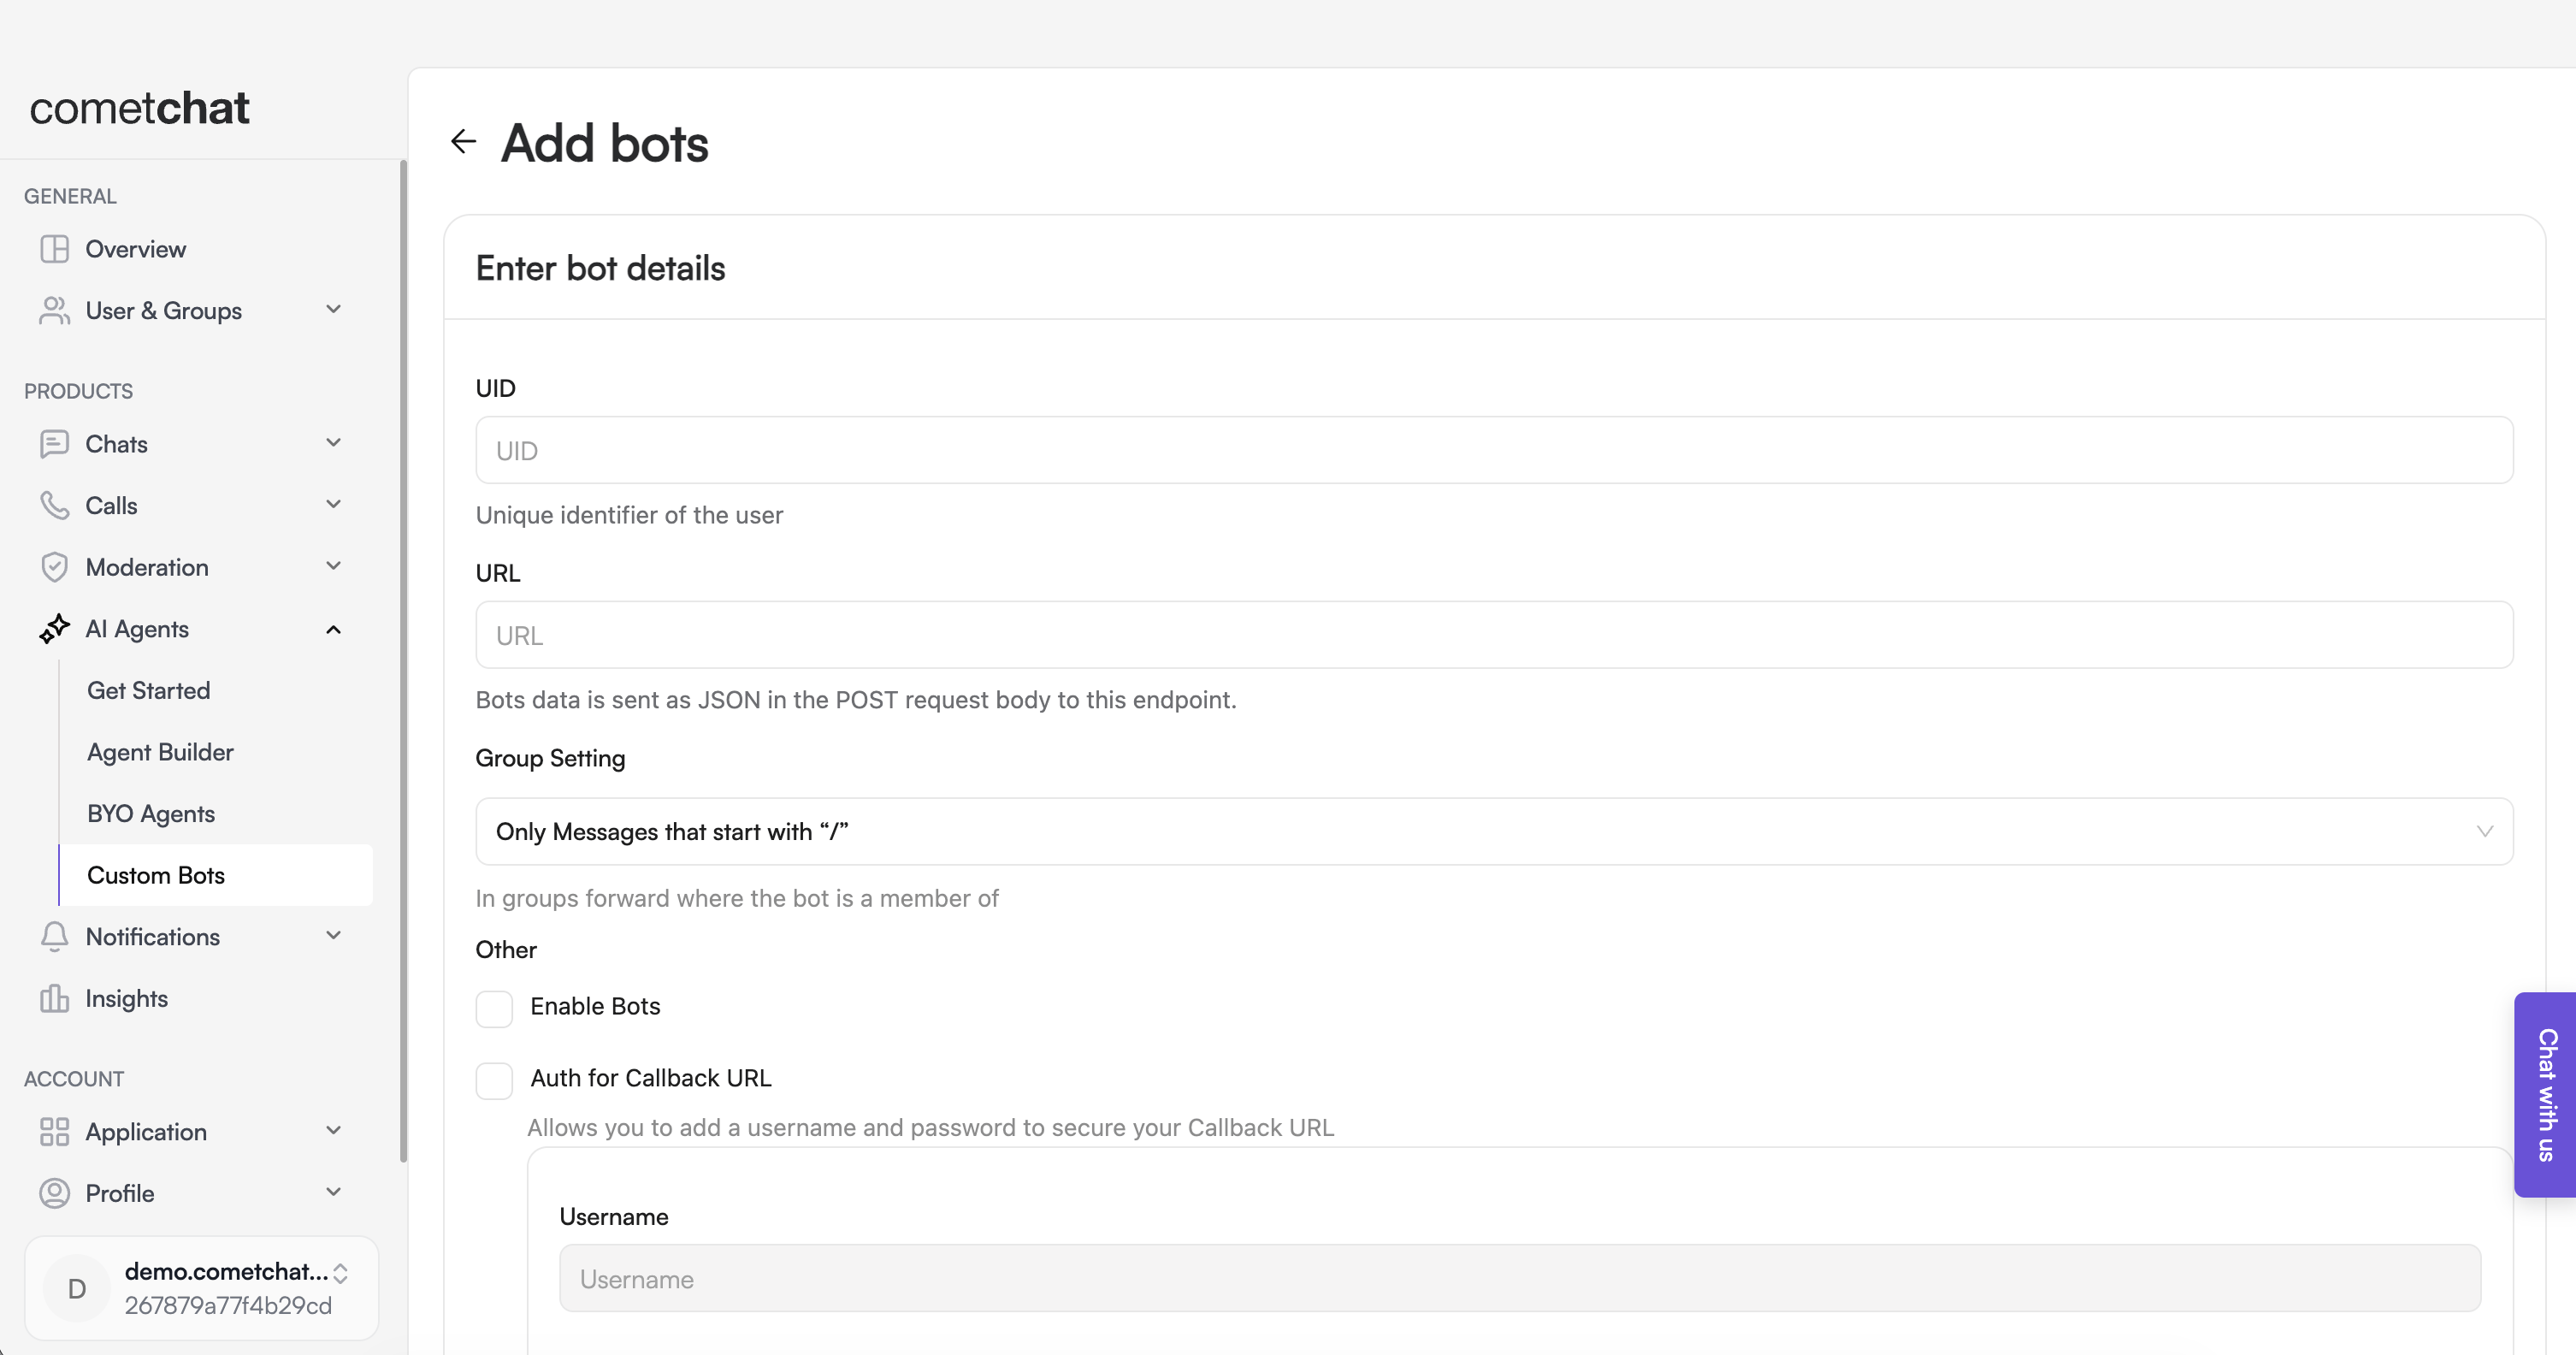
- Login to CometChat dashboard and select your app.
- Navigate to AI Agents > Custom Bots in the left-hand menu.
- Add a new bot.
- Configure the bot by saving the following details:
- UID: The identifier (UID) of the user that was created in the previous step.
- URL: The callback URL of your bot.
- Group Setting: Select the criteria for relaying a group message to your bot.
- Security: It is recommended to enable authentication for your callback URL.
- Enable the bot.
- Save the configuration.
Responding as a bot
After your bot’s callback endpoint has received and processed a message, and you’re ready to send a response back, make use of CometChat’s Send Bot Message REST API to do so. This API posts a message authored by the bot’s UID (POST /bots/{uid}/messages).
The exact JSON shape CometChat POSTs to your Callback URL is not documented on this page. Log the incoming request body from your endpoint to inspect it, or contact the CometChat team for the current payload reference.
Next steps
Custom Agents
Configure a custom agent the same way as a custom bot.
Send Bot Message (REST API)
Post the bot’s reply back into the conversation.
Create User (REST API)
Create the user account that backs the bot.
Agent Builder APIs
Build native agents with tools and knowledge bases instead.